操作环境
- 硬件:华为云服务器
- 操作系统:Rocky Linux 9.0 64bit
- 服务器软件:nginx 1.24.0,php 8.2.6,openssl 3.0.7,MySQL 8.0.33
前提条件
- nginx已安装好,并开启SSL
- PHP已安装好
- MySQL已安装好
相关说明
安装前请注意检查待安装的WordPress版本与PHP版本和MySQL版本的兼容性。
## 要运行WordPress,请确保您的主机支持:
此版本。我们推荐Apache或Nginx作为运行WordPress的最可靠和功能最强的服务器,但任何支持PHP和MySQL的服务器都可运行。尽管如此,我们无法测试所有可能的环境,但我们主机页面上的每个主机服务都毫无问题的支持上述环境。
详情请参见:
系统要求 | WordPress.org China 简体中文
建议安装最新版本的nginx、openssl、PHP、MySQL和WordPress,目前上述软件的最新版本如下:
- nginx最新版本为1.24.0。
- openssl最新版本为 3.0.8。(我的yum源里openssl最新版本是3.0.7)
- php最新版本为8.2.6。
- MySQL最新版本为 8.0.33。
- WordPress最新版本为6.2.2。
操作步骤
1.从WordPress官网下载最新版本安装包
下载地址为:
建议直接下载 tar.gz包,方便在linux服务器上用tar解压缩。
方式一:本地windows终端下载并上传
- 使用windows终端下载上述软件包,在下载目录下会新建wordpress-6.2.2-zh_CN.tar.gz文件。
- 将下载的文件上传云服务器相关目录(可以在MobaXterm_Personal中通过SFTP上传),建议是nginx安装目录的html子目录。
方式二:在云服务器上直接下载。
|
1 2 3 4 |
cd /usr/local/nginx/html wget https://cn.wordpress.org/latest-zh_CN.tar.gz |
下载完成后,会得到wordpress-6.2.2-zh_CN.tar.gz文件。
2.用tar解压缩下载的软件包
|
1 2 3 |
tar -zxvf wordpress-6.2.2-zh_CN.tar.gz |
软件包解压缩后,会在当前目录(html)下得到wordpress的文件夹。
3.创建wordpress数据库及登录用户名和密码
方式一:在windows终端使用MySQL Workbench 8.0软件
略。
方式二:在linux服务器上使用命令行方式
(1)连接mysql,并查看user数据。
|
1 2 3 4 5 6 7 8 9 10 11 12 13 14 15 16 17 18 19 20 21 22 23 24 25 26 27 28 29 30 31 32 33 |
# mysql -u root -p Enter password: Welcome to the MySQL monitor. Commands end with ; or \g. Your MySQL connection id is 35 Server version: 8.0.33 MySQL Community Server - GPL Copyright (c) 2000, 2023, Oracle and/or its affiliates. Oracle is a registered trademark of Oracle Corporation and/or its affiliates. Other names may be trademarks of their respective owners. Type 'help;' or '\h' for help. Type '\c' to clear the current input statement. mysql> use mysql; Reading table information for completion of table and column names You can turn off this feature to get a quicker startup with -A Database changed mysql> select host,user,plugin from user; +-----------+------------------+-----------------------+ | host | user | plugin | +-----------+------------------+-----------------------+ | % | root | mysql_native_password | | localhost | mysql.infoschema | caching_sha2_password | | localhost | mysql.session | caching_sha2_password | | localhost | mysql.sys | caching_sha2_password | +-----------+------------------+-----------------------+ 4 rows in set (0.00 sec) mysql> |
(2)新建用户wordpress,注意将命令中的 User-WordPress-PW-1234替换为自己设置的密码。
|
1 2 3 4 5 6 7 8 9 10 11 12 13 14 15 16 17 18 19 |
...... [2023-05-23 18:27:10] mysql> use mysql; [2023-05-23 18:27:19] mysql> CREATE USER 'wordpress'@'%' IDENTIFIED BY 'User-WordPress-PW-1234'; ...... [2023-05-23 18:27:25] mysql> FLUSH PRIVILEGES; ...... [2023-05-23 18:27:34] mysql> select host,user,plugin from user; [2023-05-23 18:27:34] +-----------+------------------+-----------------------+ [2023-05-23 18:27:34] | host | user | plugin | [2023-05-23 18:27:34] +-----------+------------------+-----------------------+ [2023-05-23 18:27:34] | % | root | mysql_native_password | [2023-05-23 18:27:34] | % | wordpress | mysql_native_password | [2023-05-23 18:27:34] | localhost | mysql.infoschema | caching_sha2_password | [2023-05-23 18:27:34] | localhost | mysql.session | caching_sha2_password | [2023-05-23 18:27:34] | localhost | mysql.sys | caching_sha2_password | [2023-05-23 18:27:34] +-----------+------------------+-----------------------+ [2023-05-23 18:27:34] 5 rows in set (0.00 sec) |
(3)查看并新建数据库 wordpress
首先,使用指令 show databases检查是否存在wordpress数据库,如没有,则用以下指令创建它: create database wordpress。
|
1 2 3 4 5 6 7 |
...... [2023-05-23 18:27:40] mysql> show databases; ...... [2023-05-23 18:27:50] mysql> create database wordpress ...... |
(4)为数据库用户wordpress赋予访问数据库wordpress的所有权限。
指令如下: grant all on wordpress.* to 'wordpress'@'%';
|
1 2 3 4 5 6 7 |
...... [2023-05-23 18:27:50] mysql> grant all on wordpress.* to 'wordpress'@'%'; [2023-05-23 18:28:15] mysql> FLUSH PRIVILEGES; ...... [2023-05-23 18:28:45] mysql> quit |
4.用浏览器访问/wordpress/wp-admin/install.php
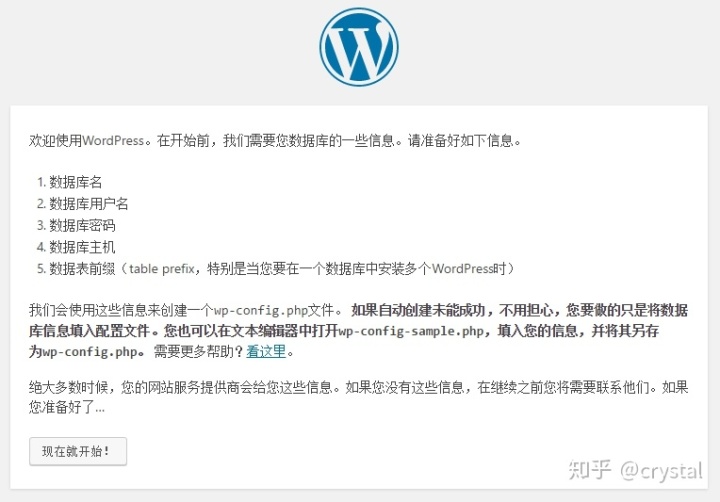
假定我们在前期nginx安装时已设置html为root目录(系统默认设置),在浏览器网址输入:wslibai.com/wordpress/wp-admin/install.php即可启动wordpress配置界面。(请注意将网站域名替换为你自己的域名或主机IP地址)


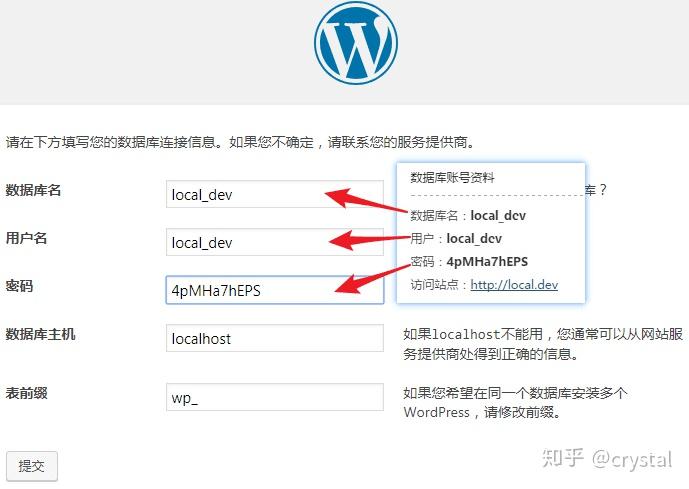
因安装过程未截屏保留相关信息,以上三张图片取自下文:WordPress搭建教程:手把手教你搭建WordPress博客 – 知乎,特此申明。不告而取,实属无礼。若有冒犯,还请海涵。如有侵权,告知即删。
按屏幕提示信息输入相关信息,即可进入下一步配置界面(5分钟安装程序)。
如安装过程出现问题,比如 不能选择数据库等错误,请参考[[Linux WordPress 不能选择数据库问题]],也可参考以下著名的5分钟安装说明,手动复制和修改 wp-config.php文件,即可解决问题。
Installation: Famous 5-minute install
- Unzip the package in an empty directory and upload everything.
- Open wp-admin/install.php in your browser. It will take you through the process to set up a wp-config.php file with your database connection details.
- If for some reason this does not work, do not worry. It may not work on all web hosts. Open up wp-config-sample.php with a text editor like WordPad or similar and fill in your database connection details.
- Save the file as wp-config.php and upload it.
- Open wp-admin/install.php in your browser.
- Once the configuration file is set up, the installer will set up the tables needed for your site. If there is an error, double check your wp-config.php file, and try again. If it fails again, please go to the WordPress support forums with as much data as you can gather.
- If you did not enter a password, note the password given to you. If you did not provide a username, it will be admin.
- The installer should then send you to the login page. Sign in with the username and password you chose during the installation. If a password was generated for you, you can then click on “Profile” to change the password.
5.使用5分钟安装程序完成安装
在5分钟安装程序表单内,填写好相关信息,点击屏幕左下方的
安装WordPress按钮。

6.登录后台管理界面
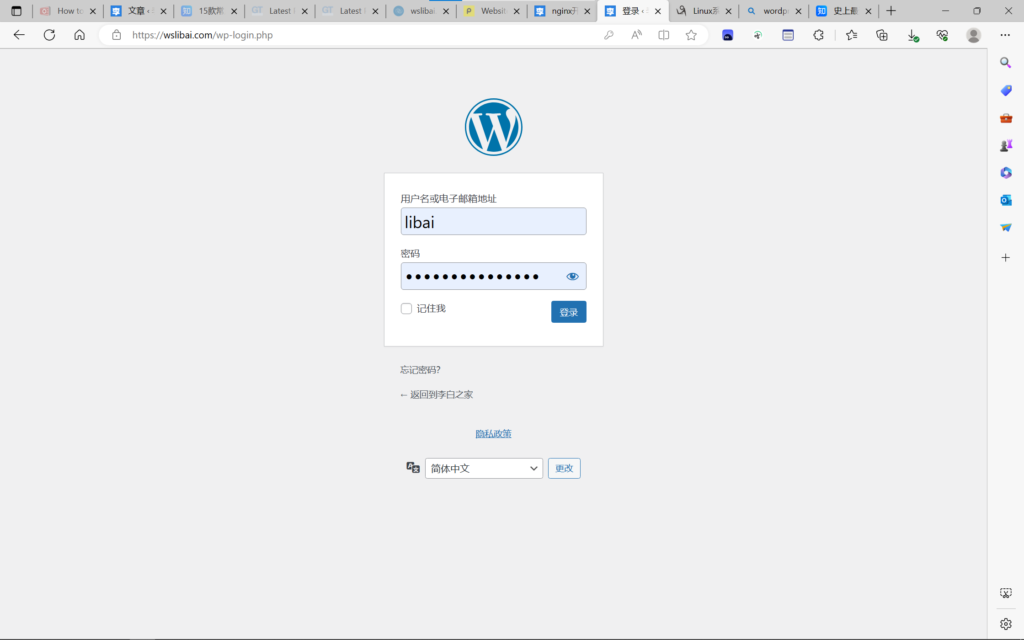
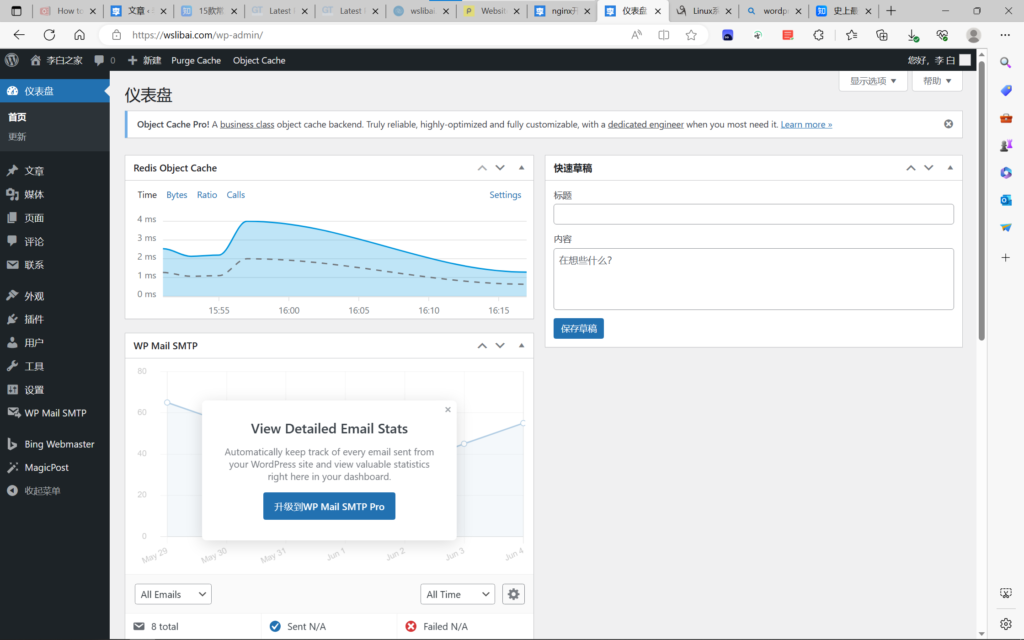
稍等一会,就进入了登录界面,输入上一步设置的用户名和密码即可登录wordpress后台管理界面。


至此,WordPress安装已经完成,现在,你可以通过管理界面安装插件、配置主题、发布文章,开启你的博主生活了。
但仍需进行一些优化配置,才能确保网站的性能保持最佳。更多信息,请查看[[WordPress网站优化]]。


This is a demo advert, you can use simple text, HTML image or any Ad Service JavaScript code. If you're inserting HTML or JS code make sure editor is switched to 'Text' mode.
[…] 具体操作过程请参考WordPress安装指南。 […]